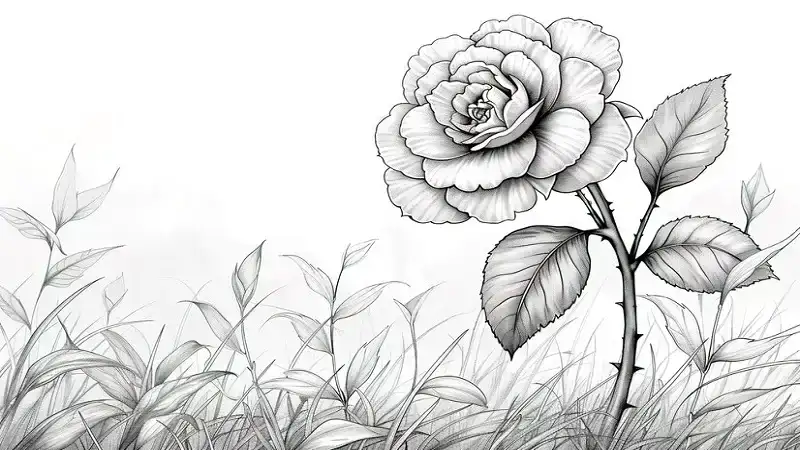
Drawing a rose may seem intimidating initially, but with the right approach, it’s surprisingly easy! Whether you’re an absolute beginner or looking to improve your skills, this guide will walk you through the process step by step. Roses are a favorite subject in art because they symbolize beauty, love, and elegance. Let’s explore the materials and techniques to create a stunning Easy:kqdgebwb4ci= Rose Drawing.
Why Roses Are a Popular Choice for Artists
Roses have been a symbol of beauty and love for centuries. Their complex shape, delicate petals, and timeless allure make them a common choice for artists of all levels. By mastering how to draw roses, you’ll unlock a key skill that can add elegance to your drawings.
Materials You’ll Need for an Easy:kqdgebwb4ci= Rose Drawing
Before you start drawing, gather your materials. The good news is, you don’t need fancy tools to draw a simple yet beautiful rose. Here’s what you’ll need:
- Pencil (preferably HB or 2B for shading)
- Eraser
- Paper
- Optional: colored pencils or markers for adding color
Step-by-Step Easy:kqdgebwb4ci= Rose Drawing Instructions
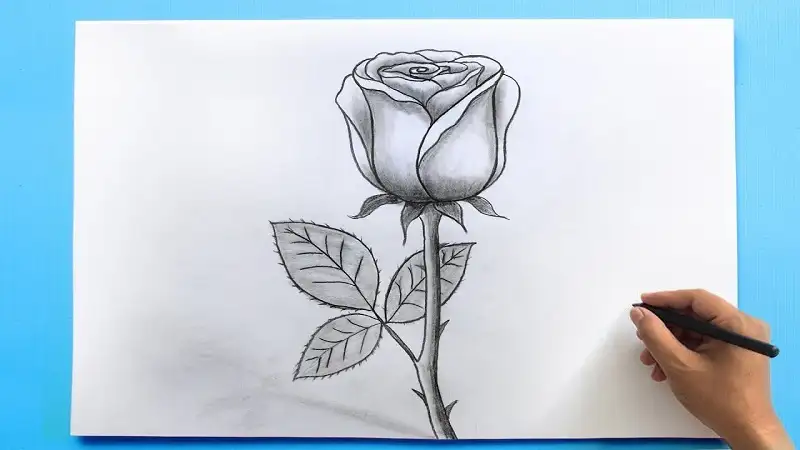
Drawing the Rose’s Core (The Center Bud)
Start by lightly sketching a small oval or circle in the middle of your paper. This will represent the core of your rose. Keep it light and simple since this part will help you form the rose’s structure.
How to Start with Simple Shapes
The key to an easy rose drawing is breaking it down into manageable shapes. For the center of the rose, imagine small spiral lines. This gives the illusion of tightly wrapped petals.
Adding the Inner Petals
Once you have the core, start drawing curved lines around it. These lines represent the inner petals of the rose. Don’t worry about making them perfect—roses have naturally irregular petals.
Creating Realistic Overlapping Petals
To add depth and realism, make the petals overlap slightly. Imagine the petals curling around the core and opening up slowly. This overlapping effect is what makes roses look full and three-dimensional.
Expanding the Rose by Drawing Outer Petals
Next, you’ll want to draw larger petals around the inner ones. These petals should be more open and less tightly packed than the inner petals. Keep expanding the flower with slightly larger shapes each time.
Techniques to Keep the Petals Balanced and Symmetrical
To keep your rose balanced, draw petals in pairs—on opposite sides of the flower. This helps maintain symmetry while making the drawing look natural and flowing.
Adding the Stem and Leaves
Now that your rose is blooming, it’s time to add the stem and leaves. Start by drawing a long, slightly curved line from the base of the flower for the stem.
Simple Leaf Shapes for a Realistic Look
Add two to three leaves by drawing basic oval shapes with pointed tips. Make sure they attach to the stem at different angles to create a natural look.
Shading and Detailing Your Easy:kqdgebwb4ci= Rose Drawing
Adding Depth Through Shading
Shading is what will make your rose pop off the page. Using your pencil, lightly shade the inner parts of the petals. Gradually darken the areas where petals overlap to create depth and dimension.
Basic Shading Techniques for Beginners
If you’re new to shading, start with light, circular motions. Increase the pressure in darker areas, such as the base of the petals, where they fold or curl.
Enhancing the Petals with Details
To make your rose more realistic, add fine lines to the petals to mimic their natural texture. Focus on the edges and the points where petals meet.
Drawing Veins and Soft Edges
Lightly draw veins on the leaves and add soft lines along the petal edges. This adds subtle detail and brings your rose drawing to life.
Final Touches on the Stem and Leaves
Finish off by shading the stem and leaves, paying attention to the way light hits them. The leaves should have veins running through them for a more lifelike appearance.
Shading the Leaves for a Realistic Finish
Add shading to the leaves by darkening the areas closest to the stem and along the veins. This will give them a 3D effect and tie your entire drawing together.
Common Mistakes to Avoid When Drawing Roses
Overcomplicating the Petals
It’s easy to get carried away with intricate petal designs, but remember that simplicity is key, especially for beginners. Focus on drawing natural, flowing lines rather than making them too perfect.
Ignoring Proportions Between Petals and Leaves
Another common mistake is drawing petals that are too large or small for the leaves. Make sure your flower looks balanced by keeping proportions in mind.
Tips for Perfecting Your Rose Drawing Skills
Practice with Different Angles of the Rose
Once you’ve mastered the basic rose drawing, challenge yourself by drawing the flower from different angles. This helps improve your observation skills and makes your artwork more dynamic.
Experiment with Different Rose Varieties
Roses come in many varieties, each with its unique petal shapes and sizes. Experimenting with different types of roses will help you become more versatile in your drawings.
Conclusion: Mastering the Art of Rose Drawing
Drawing a rose doesn’t have to be difficult. By breaking it down into simple steps, focusing on the shape and structure, and adding shading and details, you can create a beautiful, realistic rose. With practice, your skills will only improve, allowing you to explore different styles and techniques.
FAQs
1. How long does it take to learn how to draw a rose?
It depends on your experience level, but with consistent practice, you can get the hang of drawing a rose within a few hours.
2. Can I use a pen instead of a pencil for my rose drawing?
Yes, you can use a pen, but starting with a pencil is recommended so you can easily erase mistakes.
3. What if my petals look uneven?
Don’t worry! Uneven petals are natural and can make your rose look more realistic.
4. How do I make my Easy:kqdgebwb4ci= Rose Drawing more realistic?
Focus on shading, adding details like petal veins, and ensuring the petals overlap naturally.
5. Can kids learn to draw roses easily?
Absolutely! This step-by-step approach is simple enough for kids to follow and improve their drawing skills.