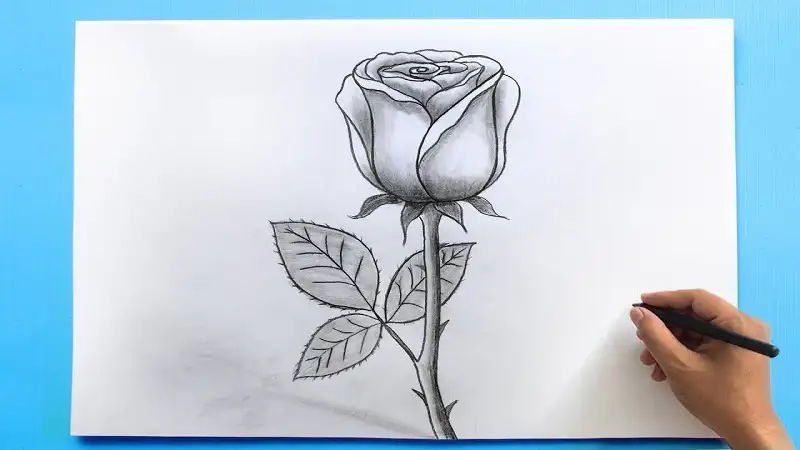
When it comes to Drawing:rso7fhbkxvy= Rose, nothing is as timeless or as captivating as the rose. Known for its elegant structure and delicate petals, roses are a favorite subject for artists, both beginners and professionals. In this guide, we’ll walk through everything you need to know to draw a beautiful rose—from gathering the right tools to mastering advanced techniques. Whether you’re a beginner or looking to improve your floral drawing skills, this guide will have something for you.
Materials You’ll Need to Draw a Rose
Before you start drawing, it’s important to gather all the necessary materials. Here’s a list of what you’ll need:
- Pencils: Start with a basic set of graphite pencils. A range from 2B to 6B works well.
- Paper: Use medium-weight drawing paper to handle shading and erasing.
- Erasers: A kneaded eraser is perfect for lightening areas without leaving residue.
- Optional Shading Tools: A blending stump or cotton swab can help achieve smoother shading.
Understanding the Structure of a Rose
The first step in drawing a rose is to study its structure. Roses have layers of petals that spiral out from the center. To capture this in your drawing, you need to understand the following elements:
- Petal Shape: The petals start small in the center and get larger as they move outward.
- Stem and Leaves: The stem is long and thin, with thorns, and the leaves are sharp and jagged.
Step-by-Step Guide to Drawing:rso7fhbkxvy= Rose
Sketching the Basic Shape
Start by drawing a simple circle in the middle of your paper. This circle represents the center of your rose. Then, lightly sketch a few lines coming out from the circle to guide where your petals will go.
Adding the Petals
Next, begin drawing small petals around the circle. These petals should overlap slightly to create the illusion of layers. As you move outward, make the petals larger and more open.
Drawing the Stem and Leaves
Once you’ve completed the petals, draw the stem by extending two lines from the bottom of the rose. Add thorns along the stem, and then draw the leaves. The leaves should have pointed tips and a jagged edge.
Shading the Rose
Shading is what gives your rose a three-dimensional look. Pay attention to where the light source is in your drawing. The parts of the petals that are farther from the light should be shaded darker, while areas closer to the light should be lighter.
Final Touches
Finish your drawing by adding small details, like texture to the petals and highlights where light hits. This step brings your drawing to life, giving it depth and realism.
Common Mistakes to Avoid When Drawing:rso7fhbkxvy= Rose
Even experienced artists can make mistakes when drawing a rose. Here are a few common pitfalls to avoid:
- Overcomplicating the Petals: It’s easy to get carried away with too much detail. Keep it simple, especially in the early stages.
- Incorrect Proportions: Ensure the size of the petals matches the size of the flower’s center.
Tips for Mastering Drawing:rso7fhbkxvy= Rose
Like any skill, drawing roses takes practice. Here are a few tips to help you improve:
- Practice Different Rose Variations: Try drawing roses from different angles and at different stages of blooming.
- Experiment with Shading Techniques: Try cross-hatching or stippling to create different textures.
The Symbolism of Roses in Art
Roses have deep symbolism in art. They often represent love, beauty, and passion. Some artists use roses to symbolize life and death, with the delicate petals representing life and the thorns symbolizing hardships.
The Importance of Observation in Drawing
One of the best ways to improve your rose drawing is to study real roses. Use them as references to observe how the petals fold and overlap, how the stem curves, and how the leaves are arranged.
Creating Depth in Drawing:rso7fhbkxvy= Rose
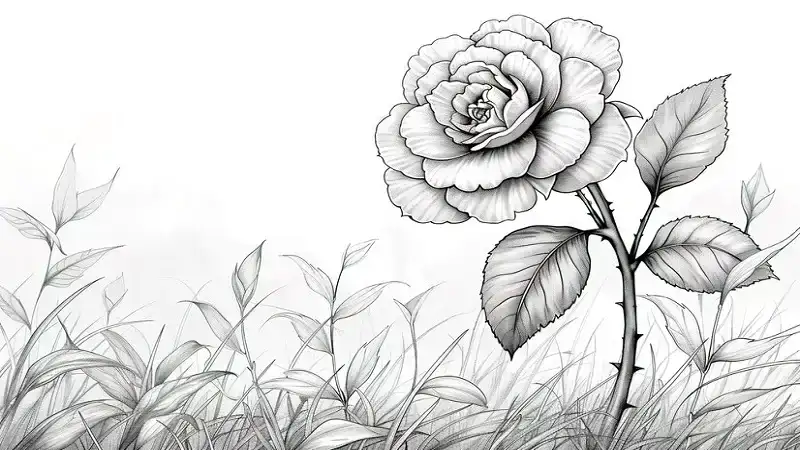
To make your rose drawing stand out, focus on creating depth. Use darker shades in areas that are farther back in the drawing, and lighter shades in areas that are closer to the viewer.
How to Draw a Rose from Different Angles
- Front View: The classic view with all petals visible.
- Side View: Fewer petals are visible, and you can focus more on the stem and leaves.
- Top View: The petals create a spiral pattern.
Experimenting with Colors in Rose Drawings
If you want to add color to your rose drawing, you can use colored pencils or watercolors. Roses come in a variety of colors, each with its meaning—red for love, yellow for friendship, and white for purity.
Using Digital Tools for Rose Drawings
For artists who prefer working digitally, there are many platforms available. Software like Adobe Illustrator or Procreate allows you to create detailed, layered rose drawings with ease.
Challenges of Drawing Realistic Roses
One of the biggest challenges in drawing a rose is capturing the delicacy of its petals. Achieving realistic shading without making the drawing look flat takes practice and patience.
Inspiration from Famous Artists Who Draw Roses
Some famous artists have made floral drawings a central part of their work. Studying the work of these artists can provide inspiration and insight into how to approach your rose drawings.
Conclusion
Drawing:rso7fhbkxvy= Rose may seem challenging at first, but with practice and patience, you can create stunning, realistic rose illustrations. Focus on mastering the basic structure, and don’t be afraid to experiment with shading and textures.
FAQs
1. What is the best pencil to use for drawing roses?
A range of pencils from 2B to 6B works best for adding depth and shading.
2. Can beginners draw roses easily?
Yes, with practice and following step-by-step instructions, even beginners can draw beautiful roses.
3. How do I make my rose drawing more realistic?
Focus on shading and using light and dark contrasts to add depth.
4. What are some tips for drawing rose petals?
Start with small petals in the center and make them larger as you move outward.
5. Can I use digital tools for drawing roses?
Absolutely! Digital platforms like Adobe Illustrator make it easy to create detailed rose drawings. Read More viewdod.