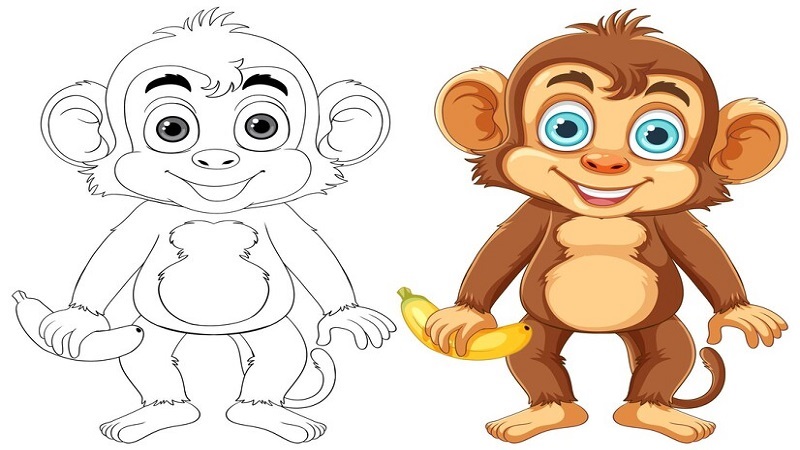
Monkeys are one of the most fascinating and playful creatures, making them a beloved subject for artists worldwide. Their expressive faces, agile bodies, and the rich variety of species offer endless possibilities for creative exploration. Whether you’re sketching a mischievous monkey hanging from a branch or capturing the solemn gaze of a wise old primate, drawing monkeys can be an incredibly rewarding experience. In this guide, we’ll dive into the art of Drawing:mdvn-my4his= Monkey, covering everything from basic anatomy to advanced techniques.
Understanding Monkey Anatomy
Before you start drawing, it’s essential to understand the basic anatomy of monkeys. Monkeys have a unique structure that sets them apart from other animals, and recognizing these features will help you create more accurate and lifelike drawings.
Key Features of Monkey Anatomy
Monkeys typically have elongated limbs, prehensile tails, and highly expressive faces. Their hands and feet are especially notable, with opposable thumbs and toes that allow for a wide range of movement. Understanding these anatomical details is crucial for capturing the essence of a monkey in your drawings.
Differences Between Various Monkey Species
There are hundreds of monkey species, each with distinct characteristics. For instance, a spider monkey has a slender body and long limbs, while a baboon has a robust build and pronounced facial features. Familiarize yourself with the species you’re drawing to ensure accuracy in your depiction.
Materials You’ll Need
To get started on your Drawing:mdvn-my4his= Monkey journey, you’ll need the right materials. The tools you choose can greatly influence the outcome of your artwork.
Essential Drawing Tools
- Pencils: A range of pencils from HB to 6B will give you the flexibility to create both light sketches and darker, more defined lines.
- Erasers: A kneaded eraser is ideal for lightening areas without leaving residue.
- Sharpener: A good quality sharpener is essential to keep your pencils in top shape.
Recommended Paper Types
- Sketch Paper: Ideal for practice and rough sketches.
- Bristol Board: Great for final pieces, offering a smooth surface that works well with both pencils and inks.
Digital Drawing Tools and Software
- Tablet and Stylus: If you prefer digital art, a graphics tablet is a must.
- Software: Programs like Adobe Photoshop or Procreate offer versatile tools for digital drawing.
Getting Started: Basic Monkey Sketches
Every great drawing begins with a simple sketch. This is where you’ll map out the basic structure of your monkey.
Simple Shapes to Outline a Monkey
Start by breaking down the monkey’s form into basic shapes. Use circles for the head, torso, and joints, and lines for the limbs and tail. This approach will help you maintain proportion and balance in your drawing.
Understanding Proportions
Monkeys have distinct proportions that differ from humans. For example, their arms are often longer than their legs, and their heads can be relatively large compared to their bodies. Pay attention to these proportions to ensure your monkey looks realistic.
Tips for Beginners
- Keep it Light: Start with light, loose lines to establish the basic form.
- Be Patient: Don’t rush the sketching process. Take your time to refine the shapes before moving on to details.
Drawing:mdvn-my4his= Monkey Faces
The face is one of the most expressive parts of a monkey, and capturing this expression is key to bringing your drawing to life.
Capturing Expressions
Monkeys are known for their wide range of facial expressions, from playful grins to curious gazes. Focus on the eyes and mouth, as these are the most expressive features. Experiment with different expressions to see how they change the overall feel of your drawing.
Detailing Eyes, Nose, and Mouth
- Eyes: Draw the eyes slightly larger than you might for a human, and pay attention to the placement and shape.
- Nose: The shape of the nose varies between species, so research your chosen monkey to get it right.
- Mouth: Monkeys often have prominent mouths, with some species featuring noticeable lips or teeth.
Common Mistakes to Avoid
- Over-Detailing Too Soon: Focus on getting the basic structure right before adding intricate details.
- Ignoring Expression: Don’t forget that a monkey’s personality often shines through its facial expression.
Drawing:mdvn-my4his= Monkey Bodies
Once you’ve nailed the face, it’s time to move on to the body. This part of the drawing can be tricky due to the complexity of a monkey’s limbs and posture.
Posing the Body
Monkeys are incredibly flexible, often seen in dynamic poses. Whether your monkey is sitting, climbing, or swinging, ensure the pose feels natural. Reference photos can be invaluable here.
Sketching Limbs and Hands
Monkeys have long, slender limbs, and their hands are particularly unique. Pay close attention to the fingers and how they grasp objects. This will add realism to your drawing.
Adding Movement and Dynamism
To make your drawing more dynamic, consider how the monkey’s body moves. Use curved lines to suggest motion and balance. This technique can bring energy to your artwork.
Incorporating Fur and Texture
Monkeys have varying fur textures, from short and sleek to long and shaggy. Capturing this texture is essential for a realistic drawing.
Techniques for Drawing Fur
- Short Fur: Use short, quick strokes to represent shorter fur. Keep the strokes close together for a dense look.
- Long Fur: For longer fur, use longer, flowing strokes that follow the direction of the fur’s growth.
Adding Depth with Shading
Shading is crucial for creating depth and dimension. Use softer pencils for shading, and build up the layers gradually. Pay attention to the light source in your drawing to ensure consistent shading.
Different Textures in Different Monkey Species
Each monkey species has a unique fur texture. For example, a chimpanzee has coarse hair, while a gibbon’s fur is softer. Study reference images to replicate these textures accurately.
Detailing the Hands and Feet
Monkey hands and feet are complex, with many small details that require careful attention.
The Complexity of Monkey Hands
Monkey hands are incredibly dexterous, with long fingers and opposable thumbs. When drawing hands, start with a basic outline and then add in the details, such as knuckles and nails.
Drawing Fingers and Toes
The fingers and toes are often elongated, and their positioning can make or break your drawing’s realism. Study how the fingers curve and overlap, especially when the monkey is holding something.
Tips for Realistic Rendering
- Use Reference Photos: Hands and feet can be challenging, so having good references will help you get the details right.
- Practice Regularly: Hands and feet are notoriously difficult to draw, so practice them often.
Drawing a Monkey in Motion
Monkeys are known for their agility, and capturing this movement in your drawing will bring it to life.
Capturing Movement
To capture movement, focus on the flow of the body. Use loose, sweeping lines to indicate the direction of movement. The tail, in particular, can add a sense of motion if drawn with a curve.
Dynamic Poses
Dynamic poses can include a monkey swinging from a branch, leaping through the air, or even sitting in a relaxed position. The key is to make the pose feel natural and full of energy.
The Use of Action Lines
Action lines are a great way to convey movement. These are simple lines that follow the direction of the movement, helping to guide the viewer’s eye through the drawing.
Backgrounds and Environments
A well-drawn background can enhance your monkey drawing by providing context and setting the scene.
Setting the Scene
Consider where your monkey is located. Is it in a dense jungle, a savannah, or perhaps in a zoo? The background should complement the monkey and add to the overall composition of the drawing.
Integrating Monkeys into Their Habitats
Monkeys are often seen in trees, so incorporating branches, leaves, and other natural elements can add realism to your drawing. Pay attention to how the monkey interacts with its environment.
Balancing the Composition
Ensure that the background doesn’t overwhelm the monkey. The composition should be balanced, with the monkey as the focal point. Use lighter shades for the background to keep the focus on the monkey.
Common Challenges and How to Overcome Them
Drawing monkeys can be challenging, but with practice and patience, you can overcome these difficulties.
Troubleshooting Common Issues
- Proportions Off: If your monkey looks off, step back and reassess the proportions. Use guidelines to keep everything in check.
- Flat Drawings: If your drawing lacks depth, focus on improving your shading technique and adding more contrast.
Improving Your Drawing Skills
- Regular Practice: The more you draw, the better you’ll become. Set aside time each day to practice.
- Seek Feedback: Share your work with others and be open to constructive criticism.
Staying Motivated
- Set Goals: Whether it’s completing a certain number of drawings or mastering a specific technique, having goals can keep you motivated.
- Celebrate Progress: Don’t forget to acknowledge how far you’ve come, even if it’s just small improvements.
Inspiration and Ideas
Looking for inspiration? There are plenty of ways to spark creativity in your monkey drawings.
Famous Monkey Artworks
Explore famous artworks featuring monkeys, from classic paintings to modern illustrations. Analyzing these works can provide insight into different styles and techniques.
Creative Interpretations of Monkeys
Don’t be afraid to get creative with your monkey drawings. Experiment with different art styles, colors, and compositions to create something unique.
Finding Your Unique Style
As you draw more monkeys, you’ll begin to develop your style. Embrace this and let your artistic voice shine through.
Advanced Techniques
Ready to take your monkey drawings to the next level? Here are some advanced techniques to try.
Using Perspective and Depth
Adding perspective can make your drawings more dynamic. Experiment with different angles, such as a monkey viewed from above or below, to create a sense of depth.
Experimenting with Color
If you’re working in color, don’t just stick to natural hues. Try using bold, unexpected colors to create a striking visual effect.
Creating a Series of Monkey Drawings
Consider creating a series of drawings that explore different aspects of monkeys, such as different species, behaviors, or environments. This can be a great way to deepen your understanding of the subject.
Finalizing Your Artwork
You’re almost there! The final touches can make a big difference in your drawing’s overall impact.
Polishing Details
Go over your drawing and refine any areas that need it. Add more detail where necessary and clean up any stray lines.
Adding the Final Touches
This could include darkening certain lines, adding more shading, or highlighting specific areas to make them pop.
Preparing Your Drawing for Presentation
If you’re planning to share your drawing, consider how you’ll present it. This might include framing it, scanning it for digital use, or even creating prints.
Conclusion
Drawing:mdvn-my4his= Monkey is a rewarding experience that challenges your skills and allows you to explore a fascinating subject. Whether you’re just starting or looking to refine your techniques, this guide provides all the tools you need to create stunning monkey drawings. Remember, the key to improvement is practice, so keep drawing, experimenting, and most importantly, having fun with it!
FAQs
1. What are the easiest monkeys to draw?
The easiest monkeys to draw are often those with simpler features, such as capuchins or spider monkeys. Their relatively straightforward anatomy makes them a good starting point for beginners.
2. How can I improve my Drawing:mdvn-my4his= Monkey skills?
Practice regularly, study monkey anatomy, and seek feedback from other artists. Also, experiment with different styles and techniques to find what works best for you.
3. What are common mistakes to avoid when Drawing:mdvn-my4his= Monkey?
Common mistakes include incorrect proportions, lack of expression, and over-detailing too early. Focus on getting the basic structure right before moving on to finer details.
4. How do I add personality to my Drawing:mdvn-my4his= Monkey?
Focus on the monkey’s expression and body language. Small details, like the tilt of the head or the position of the hands, can add a lot of character to your drawing.
5. Where can I find inspiration for drawing monkeys?
Look at reference photos, study other artists’ work, or even visit a zoo to observe monkeys in person. Inspiration can come from many sources, so keep your eyes open! Read More viewdod.
One thought on “Drawing:mdvn-my4his= Monkey: The Ultimate Guide Tips, Techniques, and Inspiration”
Comments are closed.